

To hide dash cam wires, tuck the cable into the gap between the windshield and the headliner, drop it down the A-pillar behind the trim seam or along the door seal, then run it under the dash to the power source. A plastic trim tool does the work, and no panels need to come off.
How do you hide dash cam wires without removing any trim panels?
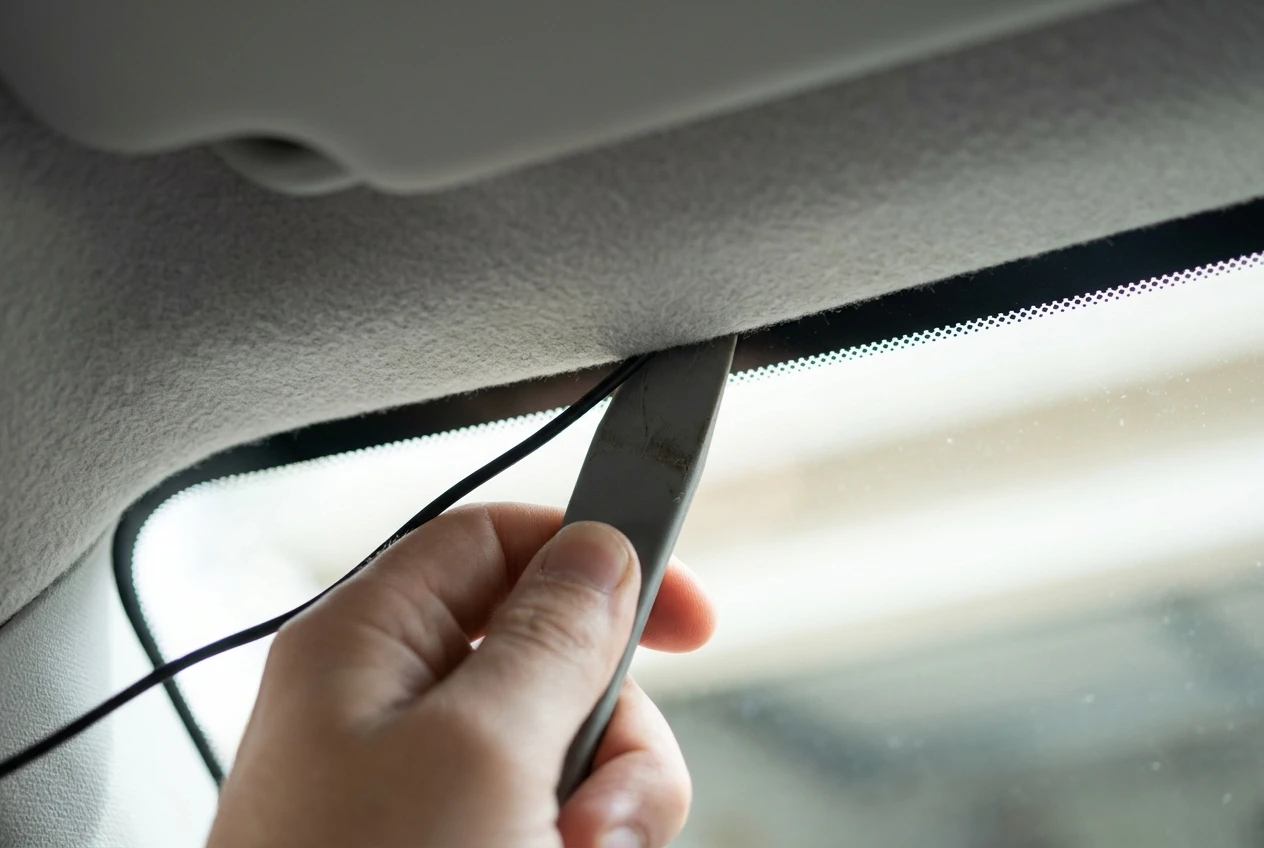
You hide the cable by pushing it into the gaps that already exist between panels, using a plastic trim tool or a similar flat, blunt tool. Car interiors are built with seams where the headliner meets the windshield, where the A-pillar trim meets the dash, and where the dash meets the door seal. Each of these seams can hold a thin cable without any force.
The route has four stages:
- Mount the camera on the windshield and leave the cable loose.
- Tuck the cable along the top edge of the windshield, into the gap behind the headliner.
- Bring it down the A-pillar on the passenger side, behind the trim or along the door seal.
- Run it under the dash and through the footwell to the power source.
Prying is not required at any stage. If a panel resists, the cable is probably not in the seam, so lift the cable out and try again instead of forcing the tool. The goal is a cable that sits in a gap and stays there on its own, with no adhesive showing and no loose slack.
Before you start, put the camera in place and check the picture. Peel-and-stick mounts are hard to reposition, and a cable routed for the wrong mount position will be too short or too long. Most owners fit the camera behind or beside the rear-view mirror so it stays out of the driver’s line of sight. Check your local rules about what may be mounted on a windshield before you commit to a spot.
What tools do you need to conceal a dash cam cable?
You need a plastic trim tool, a few cable clips, and something to bundle excess cable. The whole kit is inexpensive, and none of it is specialised.
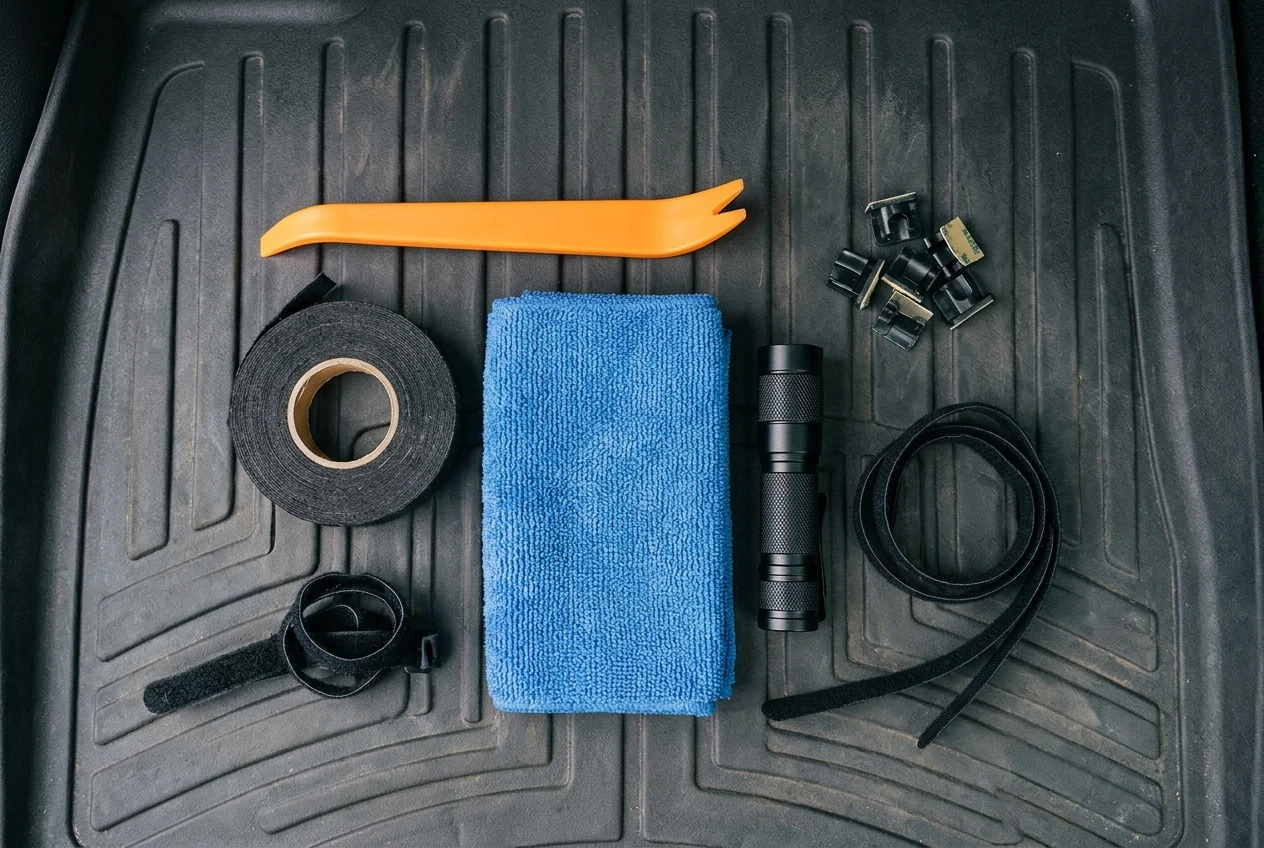
- Plastic trim tool (pry tool): a flat, blunt-edged tool that tucks cable into seams without scratching trim or tearing the headliner fabric. Plastic is the important part, because a metal screwdriver will mark panels and can cut the cable’s insulation.
- Adhesive cable clips: small clips that stick to the dash or the underside of the steering column cover and hold the cable in place where there is no seam to tuck into.
- Fabric harness tape: soft cloth tape that wraps the cable where it might rattle against plastic. Standard electrical tape works but leaves a sticky residue over time and gives a shinier, less factory look.
- Hook-and-loop ties or small zip ties: for bundling spare cable under the dash. Hook-and-loop ties can be adjusted later without cutting.
- Microfibre cloth and glass cleaner: for cleaning the glass before you stick the mount on. A clean surface helps the mount hold.
- A small torch: the footwell and the area behind the A-pillar are dark, and you will want to see where the cable ends up.
If you are hardwiring, add a circuit tester and the correct fuse tap for your car’s fuse type. Those depend on your vehicle, so check the owner’s manual before you buy. Our guide to essential dash cam accessories covers the trim tool and clips in more detail.
A credit card can stand in for the trim tool on a single run, but it is thinner and bends. A proper trim tool is easier on both the cable and your fingers.
Where should the cable run from the dash cam to the power source?
The cable should leave the camera at the top of the windshield, follow the windshield edge to the passenger-side A-pillar, drop to the footwell, and reach the power source from below the dash. This path keeps the cable out of the driver’s view and away from the pedals, steering column and airbag covers.
The passenger side is the usual choice for two reasons. The driver’s side has the steering column, pedals and often the fuse panel, so cable there is more likely to get snagged or kicked. The passenger side is also closer to the 12V socket in most cars, though some vehicles put the socket in the centre console or low on the dash, so check yours.
Where the power source sits changes the last stretch of the run:
- 12V socket on the lower dash or centre console: the cable drops down the A-pillar, runs along the bottom edge of the dash, and plugs in from below.
- Fuse box (hardwire kit): the cable follows the same route but continues to the fuse panel, wherever your manual says it is. Some cars have it in the driver’s footwell, others behind the glovebox or under the bonnet.
- USB port (some cameras and cars): the cable follows the same path to a port in the dash or console.
Before you tuck anything, lay the cable along the planned route and check that it reaches with a little slack. A cable that is too short pulls out of the seam. A cable that is too long ends up as a loop under the dash, so plan for where the spare length will be bundled.
How do you route the wire along the headliner and down the A-pillar safely?
Tuck the cable into the seam where the headliner meets the windshield, then bring it down the A-pillar by pressing it behind the trim edge or into the door seal channel. The key safety point is to keep the cable clear of the airbag, so never clip or tape it across the pillar trim.
Along the headliner
Start at the camera and press a short length of cable into the gap above the windshield with the trim tool. Work in small sections of a hand’s width. The headliner edge is usually padded fabric over a rigid backing, and the gap is held by tension, so the cable stays put once it is pushed in a few millimetres.
Push the cable in only as far as it takes to hold. You do not need to feed it deep behind the headliner, and pushing it far in makes it harder to adjust later. Run it along the edge toward the passenger-side A-pillar.
Down the A-pillar
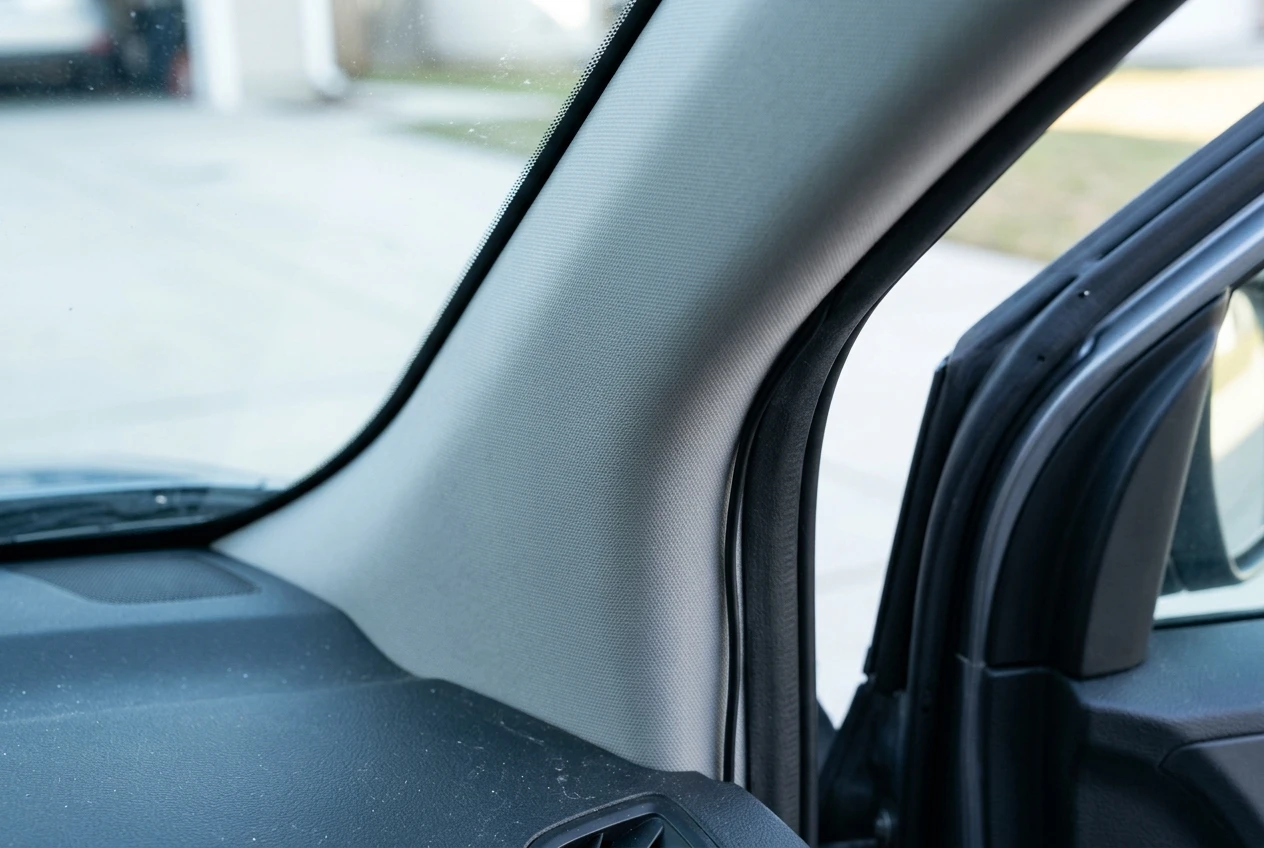
Most modern cars have a curtain airbag behind the A-pillar trim, running along the roof rail above the doors. The trim is often marked with “AIRBAG” or a similar label, and your owner’s manual will show where the airbags are. Check it before you start.
The cable must not interfere with that airbag deploying. Follow these rules:
- Do not tape, clip or glue the cable to the surface of the pillar trim.
- Do not run the cable across the front of the trim in a way that can pull the trim away when the airbag deploys.
- Tuck the cable behind the trim edge, or along the rubber door seal that runs beside the pillar, instead of fixing it to the pillar itself.
- Let the cable follow the seam in a smooth line, with no tight bends or tensioned straight runs.
If the cable fits behind the door seal at the edge of the pillar, that is often the simplest and cleanest option. The seal can be pulled back slightly by hand, the cable laid in, and the seal pressed back over it. Some drivers prefer this because it does not touch the airbag trim at all.
If you are unsure where the airbag is or how your trim is built, check the manual or ask a professional installer. Do not pry off the A-pillar trim yourself, and do not remove or disconnect an airbag for any reason.
How do you hide the cable under the dash and in the footwell?
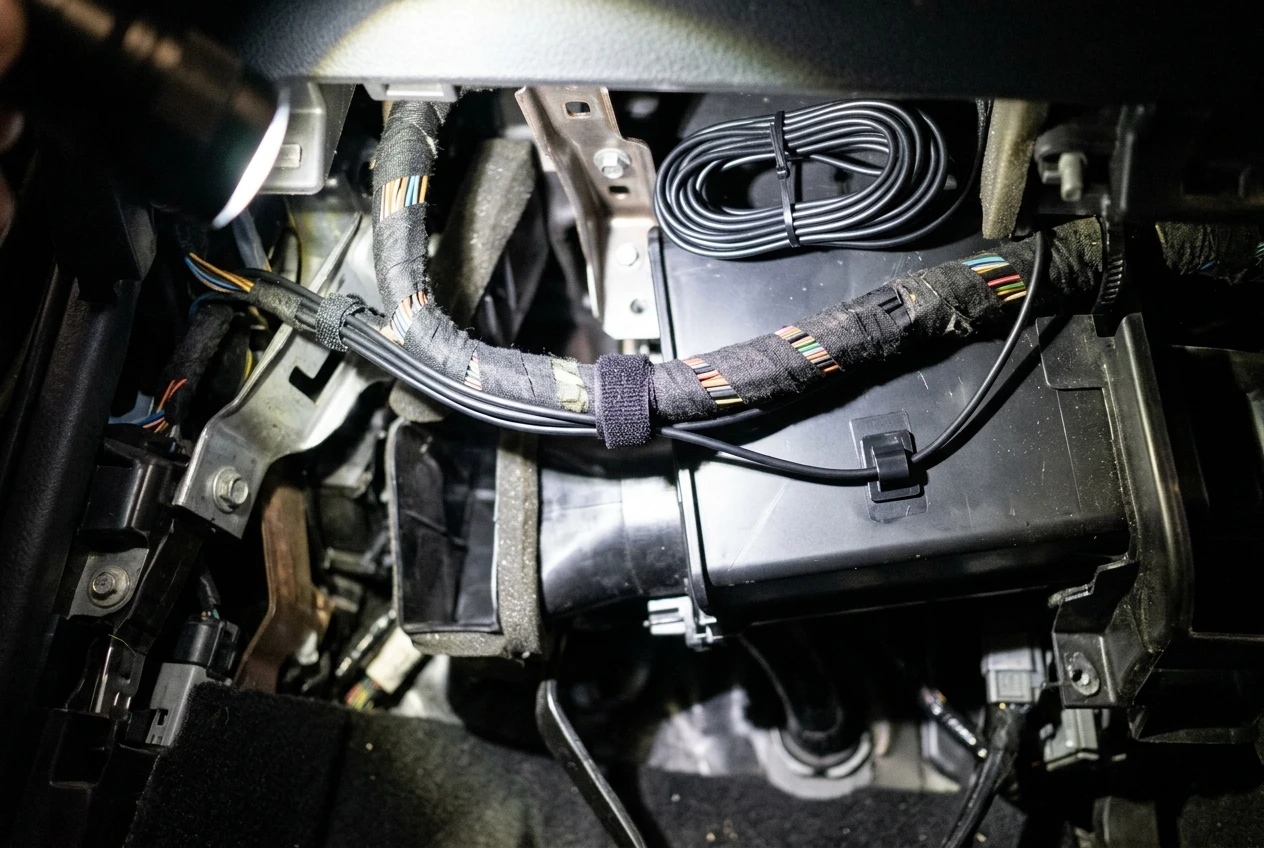
Once the cable reaches the bottom of the A-pillar, run it along the underside of the dash toward the power source and secure it out of the way of the pedals and steering column. This stretch is the one that people see least, but it is where loose cable causes the most trouble.
Follow this sequence:
- Bring the cable out of the A-pillar area and behind the side kick panel or along the bottom edge of the dash. Many cars have a small gap here that fits the cable.
- Run it along the underside of the dash toward the power source, keeping it above the footwell carpet and away from the pedals.
- Fix it with adhesive clips every so often, or bundle it against an existing wiring loom using hook-and-loop ties. Fixing to an existing loom is often the neatest approach.
- Wrap any section that touches hard plastic with fabric tape, so it does not rattle.
- Coil any excess cable into a loose bundle and tie it up under the dash, away from moving parts.
Keep the cable well clear of three places: the pedals, the steering column and its linkages, and the fuse box covers. A cable that hangs down can catch a foot or get pinched when someone adjusts the seat or steering column. If a cable touches a fuse box cover, it can stop the cover closing fully or pull it loose when the cover is opened.
If you are using a 12V socket, keep the plug end tidy. The plug and the cable behind it should sit flush and not pull downward on the socket. A short loop of cable before the plug, held by a clip, takes the strain off the plug.
Test the run before finishing. Sit in the driver’s seat, move the pedals, adjust the seat and turn the steering wheel through its full range, then look under the dash with the torch. If anything pulls, rubs or moves, adjust it before you close up.
How do you run a rear dash cam cable to the back of the car?
Run the rear cable along the headliner edge from the front camera to the back of the car, then tuck it behind the trim at the rear window. The method is the same as the front run, applied along the roof line instead of down the pillar.
For the front half, continue tucking the cable into the gap along the roof edge, on the same side as your front run so the two cables stay together where they can. Route it past the B-pillar and the rear door, using the headliner seam or the door seal channel as you did at the A-pillar.
The rear half depends on the car’s body style:
- Sedan: run the cable to the rear parcel shelf or behind the rear pillar trim, then to the rear window where the camera mounts. The cable usually stays inside the cabin, so no hole is needed.
- Hatchback, SUV or estate: the camera sits on the tailgate glass, so the cable has to cross from the body to the tailgate. Most cars have a rubber boot or grommet carrying existing wires across this gap. Follow it, and leave enough slack for the tailgate to open fully.
The curtain airbags run along the roof rails above the doors in many cars, so apply the same rule as at the A-pillar. Tuck the cable into the seam and keep it out of the way of the airbag, and do not fix it to the airbag cover or push it in far behind the trim. Your manual will show where the airbag runs.
The most common problem with rear runs is cable length. Check the length of the rear cable in the box against the length of your car before you start, because a cable that is too short cannot be fixed with a clip. If the rear cable is too short for a long vehicle, an extension designed for your camera is the safe fix. Do not splice or cut a camera cable unless the manufacturer says it is allowed.
If you are buying a dual-channel camera, our guide to the best dual channel dash cams compares models by how they are used, including cable layout.
What are the common mistakes that leave wires visible or loose?
Most visible or loose cables come from a handful of avoidable errors, and nearly all of them come from fixing cable to the wrong place or leaving slack unmanaged. These are the ones that show up most often:
- Fixing the cable to the A-pillar trim. Tape or clips on the airbag trim look untidy and can interfere with deployment. Use the seam or door seal instead.
- Pushing the cable in too far. Deep tucking behind the headliner makes the cable hard to retrieve and can bunch the fabric. Press it in just far enough to hold.
- Using a metal tool. Screwdrivers scratch trim, tear fabric and can nick cable insulation. A plastic trim tool avoids all three.
- Leaving a loop at the top of the windshield. A visible droop of cable between the camera and the headliner is the most obvious sign of a rushed install. Take up the slack along the headliner, working away from the camera.
- Dangling cable under the dash. Loose cable can catch on feet, pedals or the steering column. Bundle and clip it.
- Running the cable across the fuse box cover. This can stop the cover seating properly and can pull the cable loose later.
- Skipping the test. Move the seat, turn the wheel, open and close the tailgate, and check the cable at each point.
- Sticking the mount before planning the cable. Dry-fit the camera and the cable first, and only then peel the adhesive backing.
A final check helps: sit in the driver’s seat and look at the cable from the normal driving position. Then sit in the passenger seat, because that is where the cable is most visible. If you can see it from either seat, find the section that is out of the seam and tuck it again.
Should you use a hardwire kit or the 12V socket for the cleanest look?
A hardwire kit gives the cleanest result because it removes the plug and the visible stretch of cable to the socket, but a 12V socket install can look equally neat if the cable is tucked and clipped well. The difference is mostly at the power end.
12V socket | Hardwire kit | |
|---|---|---|
Visible hardware | A plug in the socket and a short cable run to it | No plug; the cable ends at the fuse box |
Socket left free | No, unless the camera has a pass-through | Yes |
Install effort | Plug in and tuck | Fuse tap, ground connection and circuit testing |
Power when parked | Depends on whether the socket stays live when the car is off | Can be wired for continuous power |
For a clean look, the main advantage of hardwiring is the free socket and the lack of a plug sitting in the dash. For many drivers, though, a well-run 12V cable is already hard to see, and it avoids working in the fuse box.
If you want to compare the two approaches on cost, risk and features, our pros and cons of dash cam hardwire kits post covers that in detail. For the look alone, the cable run matters more than the power source: a hardwired camera with a drooping cable looks worse than a socket-powered one with a tidy run.
Whichever you choose, finish the same way. Check that every section of cable is in a seam or clipped, that the slack is bundled out of reach of the pedals, and that nothing touches the airbag trim. Start the car, confirm the camera powers on, and look at the finished run from both front seats.
Pair this with our guide to essential dash cam accessories to pick up the trim tool and cable clips before you start.